Now I have never professed to be any good at doing nails, in fact I've admitted to being rubbish even at applying a single colour. I'm terrible - fact. That hasn't however put me off trying to do a pattern and I really like the look of galaxy nails so I decided to give it a go.
Now I think I've done a pretty good job, especially for my skill level. The picture above is a close up straight after, I still need to tidy around the edges - usually I just do this by washing my hair, that gets anything I don't want off my skin without me messing up the nail.
So this is a simple nail effect to do. You need a few colours to work with, I used more than I think is necessary but it's best to work with what you've got and well I have a lot of nail varnish.
I don't have a photo of my nails after the first coat but I first applied a clear coat to protect the nail and the next coat I added was nails inc Tooley Street which is matte finish and extremely dark blue if I didn't have this I would have just used a black. I actually left this to dry overnight before doing the rest.
I then dabbed on the Korres baby pink - I used this as it was the closest thing I have to white, but any really pale shades will work. Most tutorials I've seen say to use cosmetic sponges but all the ones I had were a bit too smooth to get a proper speckled effect so instead I used some disposable eyeshadow applicators. Between each steps I leave for around 10-20 minutes to dry.
Step 2
Now the rest of the steps are pretty straight forward and similar. It's all about building colour and layering it in the way you want. Here I added Topshop Cut the Mustard first, I dab and paint on the nail where I want the colour to go with the nail brush and then dab it with the eyeshadow applicator. I then added the OPI OY Another Polish Joke! to give it a bit of glitter.
Step 3
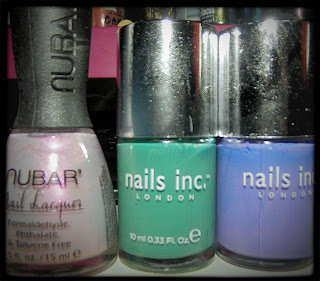
Nubar Tropical Treat, nails inc Culross Street & nails inc St Johns Wood
Step 4
OPI Meet Me on the Star Ferry, nails inc Swiss Cottage & nails inc Garrick Street
Step 5
China Glaze Ruby Pumps, OPI The Living Daylights, nails inc The Wyndham, Korres Baby Pink & Models Own Juicy Jules
Topshop Cut the Mustard & OPI OY Another Polish Joke!
Now the rest of the steps are pretty straight forward and similar. It's all about building colour and layering it in the way you want. Here I added Topshop Cut the Mustard first, I dab and paint on the nail where I want the colour to go with the nail brush and then dab it with the eyeshadow applicator. I then added the OPI OY Another Polish Joke! to give it a bit of glitter.
Step 3
Similar to step 2 but this is where I add the purples and greens. I decided last minute to first use an iridescent pale pink/purple in places. I've then gone on to use pale greens and purples but will add darker colours later.
Step 4
OPI Meet Me on the Star Ferry, nails inc Swiss Cottage & nails inc Garrick Street
Now I decided to add even more colour, you could finish it here and just add glitter but I have so many nail varnishes I decided to make use of them. I used a few metallic nail varnishes in a similar way to the other steps, I drew on lines and then dabbed the varnish to blend it in. At this point I have so many layers on I decided to give it a longer rest until I put the final coats on.
Step 5
China Glaze Ruby Pumps, OPI The Living Daylights, nails inc The Wyndham, Korres Baby Pink & Models Own Juicy Jules
Now I initially thought I would use just one glitter coat but I started playing around. I started by adding some red glitter like I had with previous shades, in patches. After that had dried I decided to use a toothpick to add the odd pale dot, I used the Korres baby pink again. After this I then added some bigger bits of glitter, instead of painting a coat on I painted some dabs onto a piece of paper and then used a toothpick to transfer the odd piece of glitter to my nails. If you have a clear glitter with different sized particles that would be even better. I finished it off by adding coats of two different styles of clear glitter, first the nails inc The Wyndham which has a blue/green overtone and then the Models Own Juicy Jules which is more of a standard glitter.
I left this for an hour to dry although I know because of the many coats it won't last that long before it chips but it can easily be filled in without looking too obvious since the style is essentially messy.
A photo of the final result in natural light.
It's a great party style and relatively easy to do. I chose to use many colours to build up the depth and overall effect but a more skilled nail artist could easily do this with just a few shades. It's still a fun shade to experiment with either way.


No comments:
Post a Comment